Interface Overview
A guided tour of the JaiCast main window and its panels.
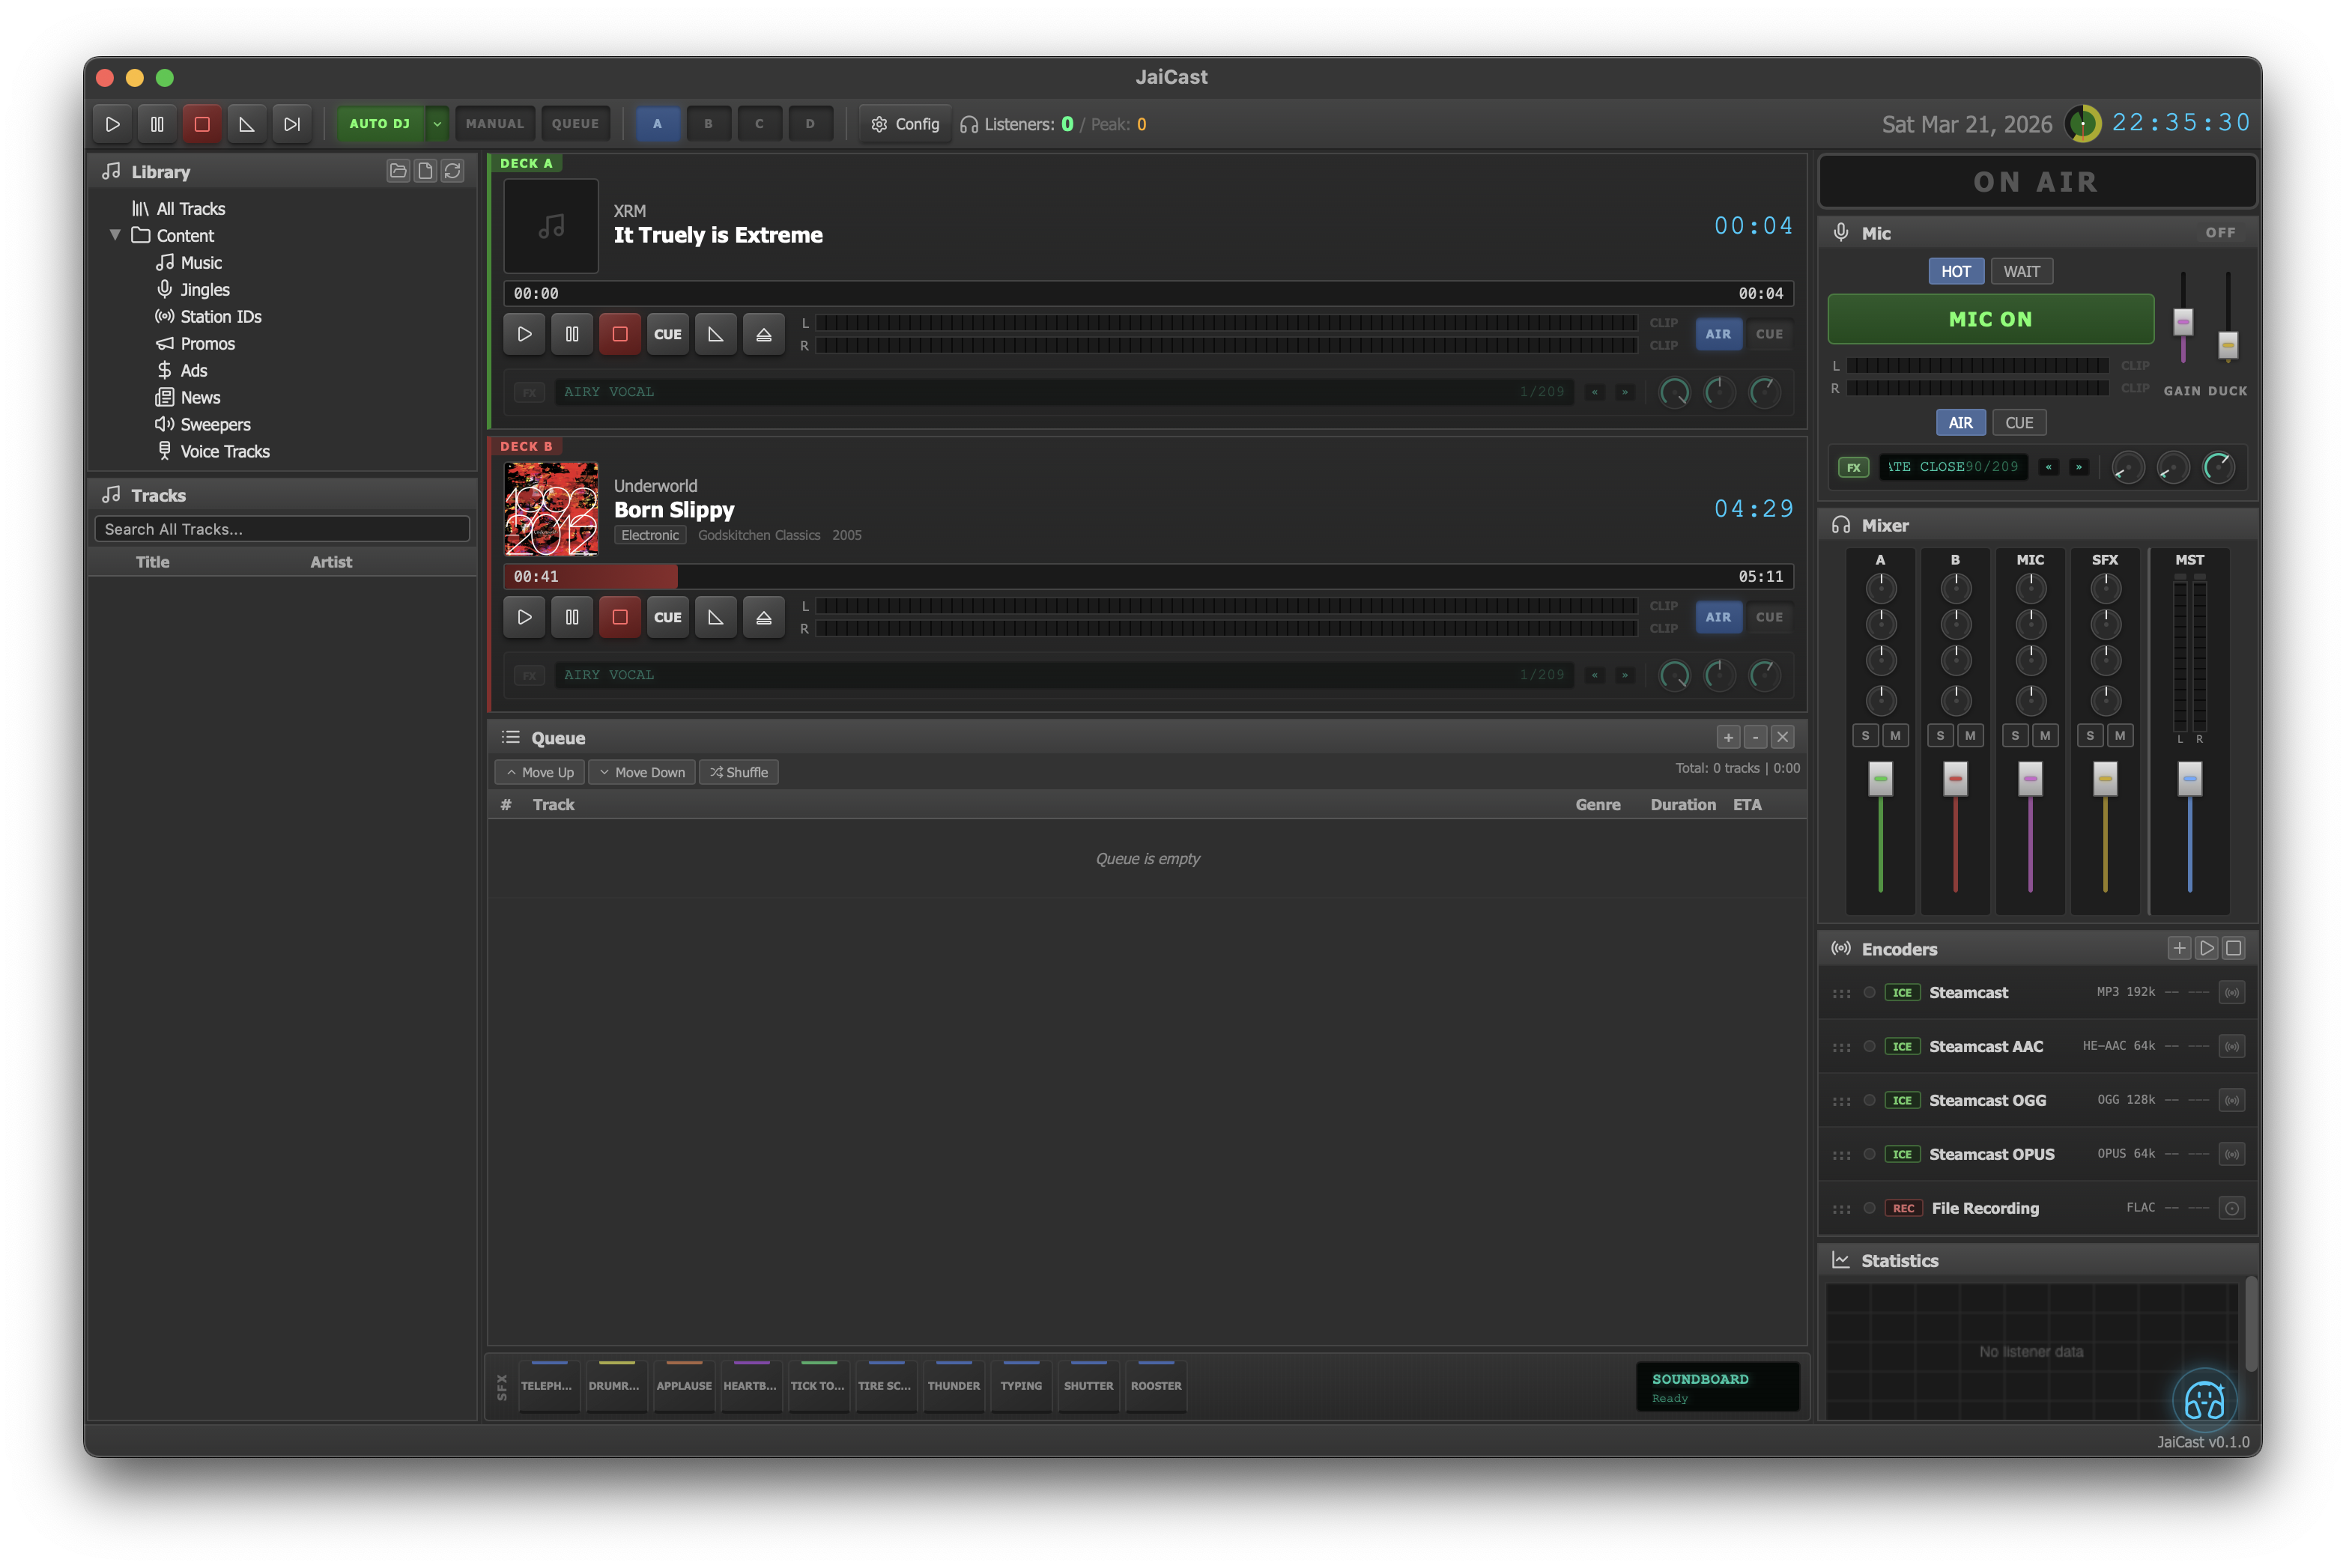
The JaiCast main window in a typical session with Auto DJ running.
JaiCast organizes its interface around a single main window with fixed panels for the most frequently used controls: transport, library browsing, deck playback, queue management, mixing, and stream encoding. Additional views are accessible through virtual desktop switching using the A/B/C/D buttons in the top toolbar. This page walks through every area so you know where to find things.
Top Toolbar

The top toolbar with transport controls, DJ mode selector, desktop switcher, and status indicators.
The toolbar spans the full width of the window and provides at-a-glance access to transport controls and station status.
Transport Controls
The left side of the toolbar contains the primary transport buttons:
- Play — Start playback on the active deck.
- Pause — Pause the active deck without losing position.
- Stop — Stop the active deck and reset to the beginning.
- Crossfade — Trigger an immediate crossfade from the current deck to the next.
- Skip — Skip the current track and advance to the next queued item.
DJ Mode Selector
Next to the transport controls is the DJ mode selector, which determines how tracks are loaded and sequenced:
- Auto DJ — Tracks are selected automatically from the rotation clock wheel and loaded into decks with timed crossfades.
- Manual — Full manual control. You load tracks and trigger transitions yourself.
- Queue — Plays through the queue in order, then stops when the queue is empty.
- AI DJ — An AI-curated mode where Claude selects and sequences tracks based on station context, mood, and listening patterns.
Status Indicators
The right side of the toolbar displays:
- Desktop A/B/C/D — Selector buttons to switch between virtual desktop layouts.
- Config — Opens the Configuration window (gear icon).
- Listeners — The current listener count across all active encoders.
- Date and Time — The current date and time, useful for live-assist operation.
Left Panel: Library
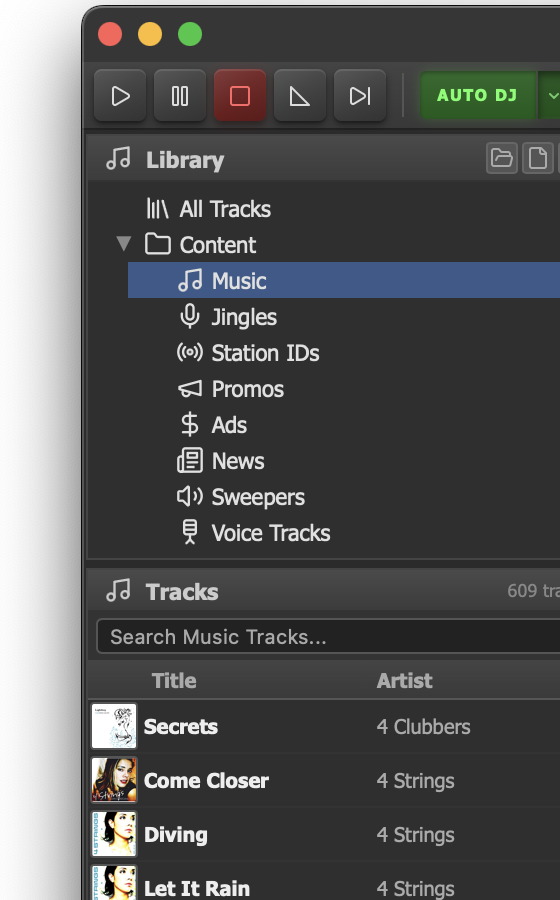
The Library panel with category tree and searchable track list.
The left panel houses the track library, where you browse, search, and drag tracks into the queue or directly onto a deck.
Category Tree
At the top of the library panel is a tree view listing your content categories:
- All Tracks — Every track in the library, regardless of category.
- Content — A parent node containing the standard content types:
- Music
- Jingles
- Station IDs
- Ads
- News
- Sweepers
- Voice Tracks
Selecting a category filters the track list below to show only tracks assigned to that category. You can create custom categories and sub-categories in the Library Settings.
Search and Track List
Below the category tree is a search bar for filtering by title, artist, or other metadata. The track list displays results in a table with columns for Art (thumbnail), Title, Artist, Album, Genre, Duration, Bitrate, and Play Count. You can drag tracks from this list into the queue or onto a deck. Right-clicking a track opens a context menu with options including Preview, editing, and adding to the queue.
Center: Decks
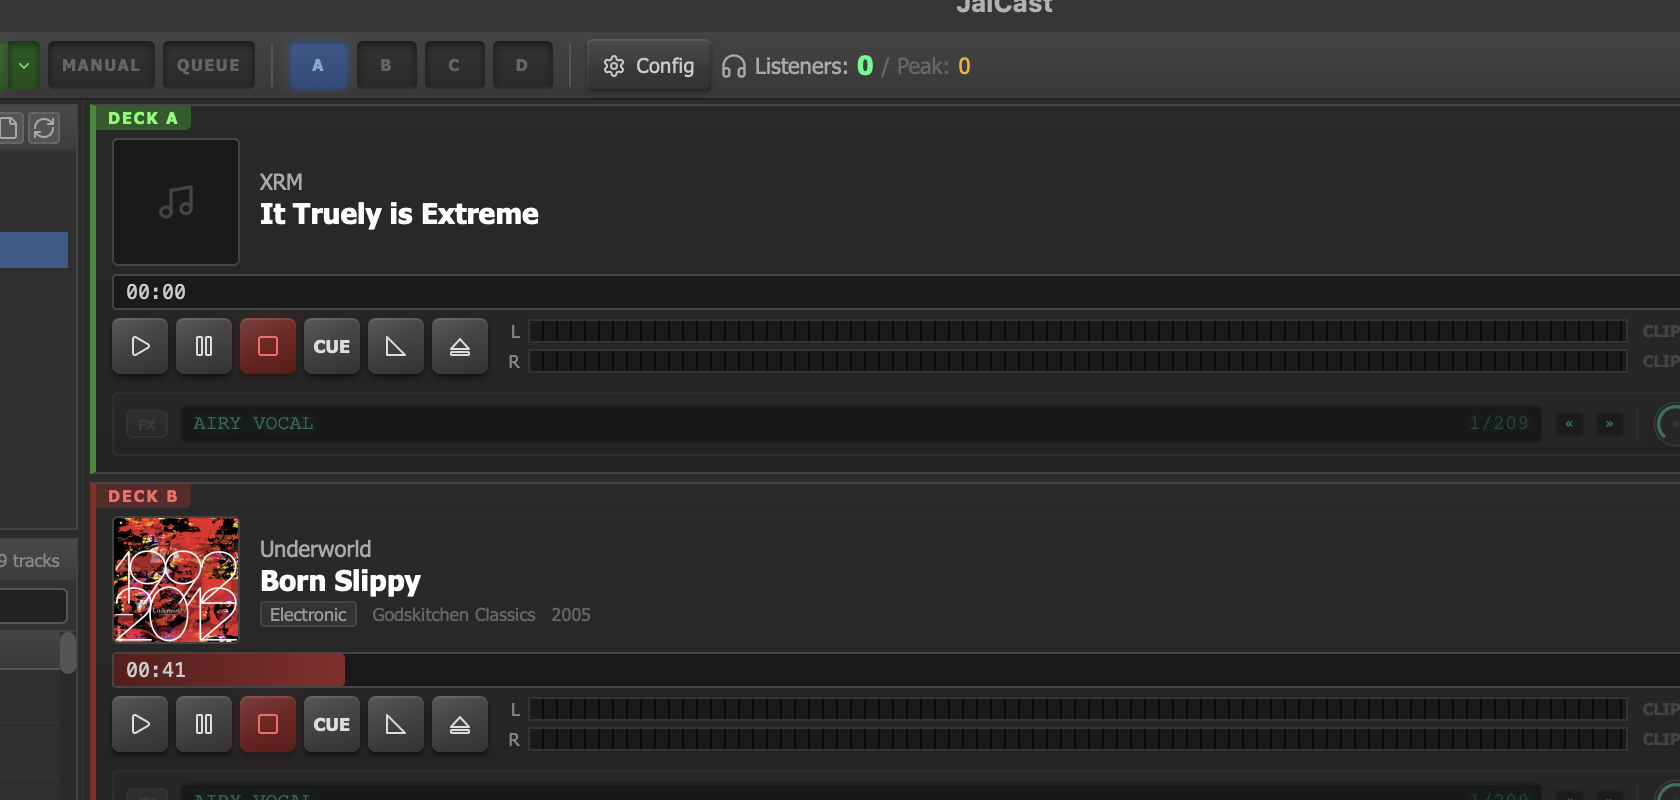
The dual-deck area with Deck A and Deck B, showing waveforms, artwork, and time counters.
The center of the window is dominated by two playback decks arranged vertically.
Deck A
Deck A is labeled DECK A in the main window. It displays:
- Track artwork (with hover-to-enlarge preview).
- Title and artist text.
- A waveform progress bar showing the current playback position, cue points, and the crossfade region.
- Elapsed and remaining time counters.
- Cue controls for setting and recalling cue points.
Deck B
Deck B is labeled DECK B and shows the same information for the track that is cued to play after the current crossfade. In Auto DJ mode, Deck B is loaded automatically from the queue. In Manual mode, you load it yourself by dragging a track onto the deck or using the context menu.
Center: Queue
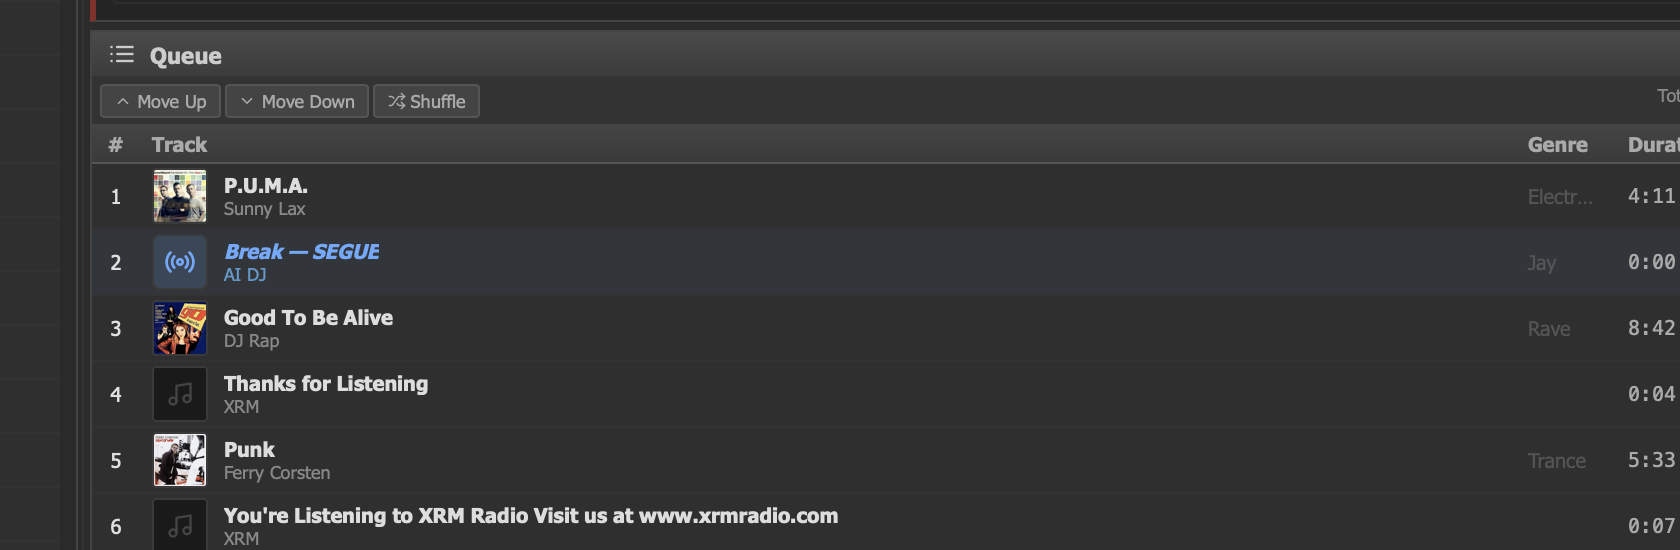
The Queue panel showing upcoming tracks with source indicators and duration.
Below the decks is the queue panel, showing the upcoming track schedule. Each entry displays the track title, artist, source (rotation slot, manual add, or AI pick), duration, and status. You can reorder entries by dragging, remove them, or insert new tracks at any position. The queue feeds Deck B when Auto DJ or Queue mode is active.
For full details, see Queue.
Right Panel
The right side of the window is a vertical stack of four sections: Microphone, Mixer, Encoders, and Statistics. The ON AIR indicator is also located in this panel, illuminating when the microphone is active with AIR routing enabled.
Microphone
The mic section contains:
- MIC ON / OFF — A large toggle button that activates or deactivates the microphone input.
- Mode buttons (HOT / WAIT) — Control when the mic activates. HOT activates the mic immediately when clicked. WAIT arms the mic and waits for the next crossfade segue before going live.
- Routing toggles (AIR / CUE) — Control where mic audio is sent. AIR routes to the broadcast mix (listeners hear it). CUE routes to the headphone preview bus only. These are independent toggles and can be combined.
When the microphone is active with AIR routing, music is automatically ducked by the configured amount. See Microphone & Voice for auto-mute and dead air detection settings.
Mixer
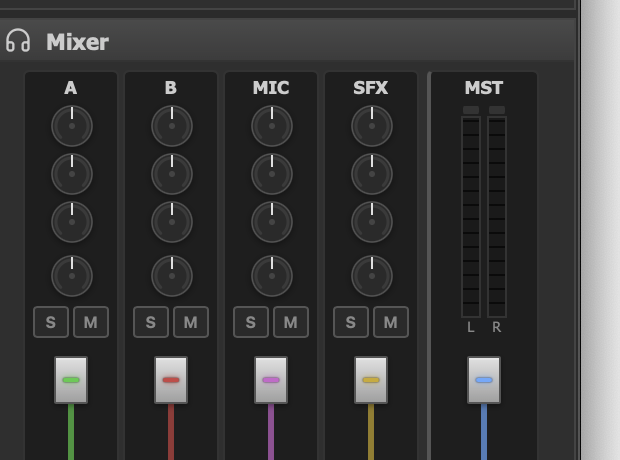
The Mixer panel with channel faders, stereo VU meters, and Solo/Mute controls.
The mixer section provides vertical faders and VU meters for each audio channel:
| Channel | Description |
|---|---|
| A | Deck A output level |
| B | Deck B output level |
| MIC | Microphone input level |
| SFX | SFX soundboard output level |
| MST | Master output level (final mix sent to encoders) |
Each channel has a stereo VU meter with peak indicators and S/M (Solo / Mute) buttons. The meters update at 30 Hz for responsive visual feedback. For detailed mixer configuration, see Mixer & Metering.
Encoders
Below the mixer is a list of configured stream encoders. Each encoder shows its name, format, and a status indicator (connected, disconnected, or error). Clicking an encoder opens its detail view. For setup instructions, see Encoders & Streaming.
Statistics
The bottom of the right panel displays aggregate statistics: total listener count across all encoders and station uptime since the last start.
Additional Views
Beyond the default layout, JaiCast organizes its workspace into four virtual desktops, switched using the A / B / C / D buttons in the top toolbar. Each desktop presents a different set of panels optimized for a specific workflow.
Desktop Switcher (A / B / C / D)
- Desktop A — Main Broadcasting — The default view with decks, library, queue, mixer, and encoders. This is where day-to-day playback and monitoring happens.
- Desktop B — Rotation Manager — Visual editor for clock wheels and rotation rule sets. Define slot sequences, assign categories, and configure artist separation rules.
- Desktop C — History & SFX — Play history log with timestamps (useful for reporting and compliance) and the 3-bank, 20-pad-per-bank SFX soundboard for triggering jingles, stingers, and effects during live operation.
- Desktop D — Encoders & Audio — Per-encoder detail views showing connection status, bitrate, format, listener count, and uptime, plus the broadcast DSP chain including equalizer, compressor, multiband compressor, limiter, stereo expander, phase rotator, and AGC.
Separate Windows
Some features open in their own windows:
- Configuration — Opened via the gear icon in the toolbar. Contains all station, library, audio, streaming, and compliance settings organized into pages.
- Track Editor — Opened by right-clicking a track and selecting Edit Track from the context menu. Allows editing of metadata, cue points, artwork, and category assignment.
- Encoder Settings — Opened from the encoder detail view. Configure server address, port, mount point, codec, bitrate, and authentication for each encoder.
System Tray
JaiCast installs a system tray icon that allows you to minimize the application to the tray for unobtrusive background operation. Clicking the tray icon opens a popup window that displays current deck information (now playing and up next), transport controls for quick playback management, and menu items for showing or hiding the main window and quitting the application. This is especially useful for stations that run JaiCast as a continuous background service on a dedicated broadcast machine.
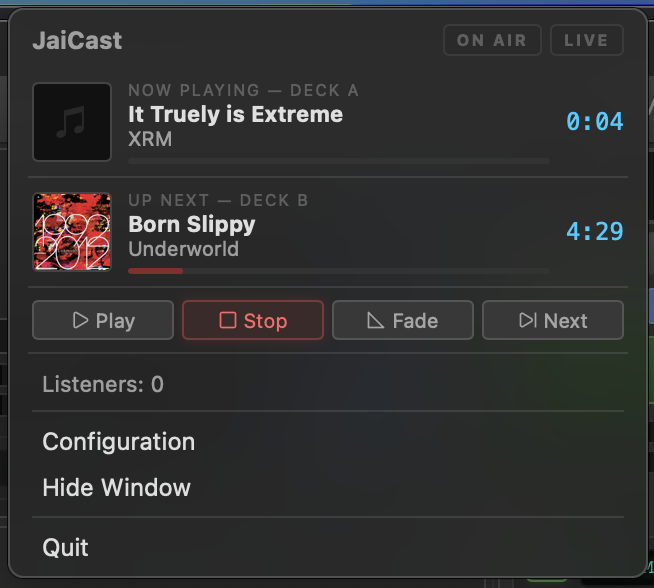
The system tray popup showing deck info, transport controls, and menu items.