Quick Start Guide
From zero to on-air in under ten minutes.
1. Install JaiCast
Download the installer for your platform from the JaiCast home page:
- macOS — Open the
.dmgfile and drag JaiCast into your Applications folder. - Windows — Run the
.exeinstaller and follow the on-screen prompts.
2. First Launch
When you open JaiCast for the first time, you will see the main workspace. Here is what to look for:
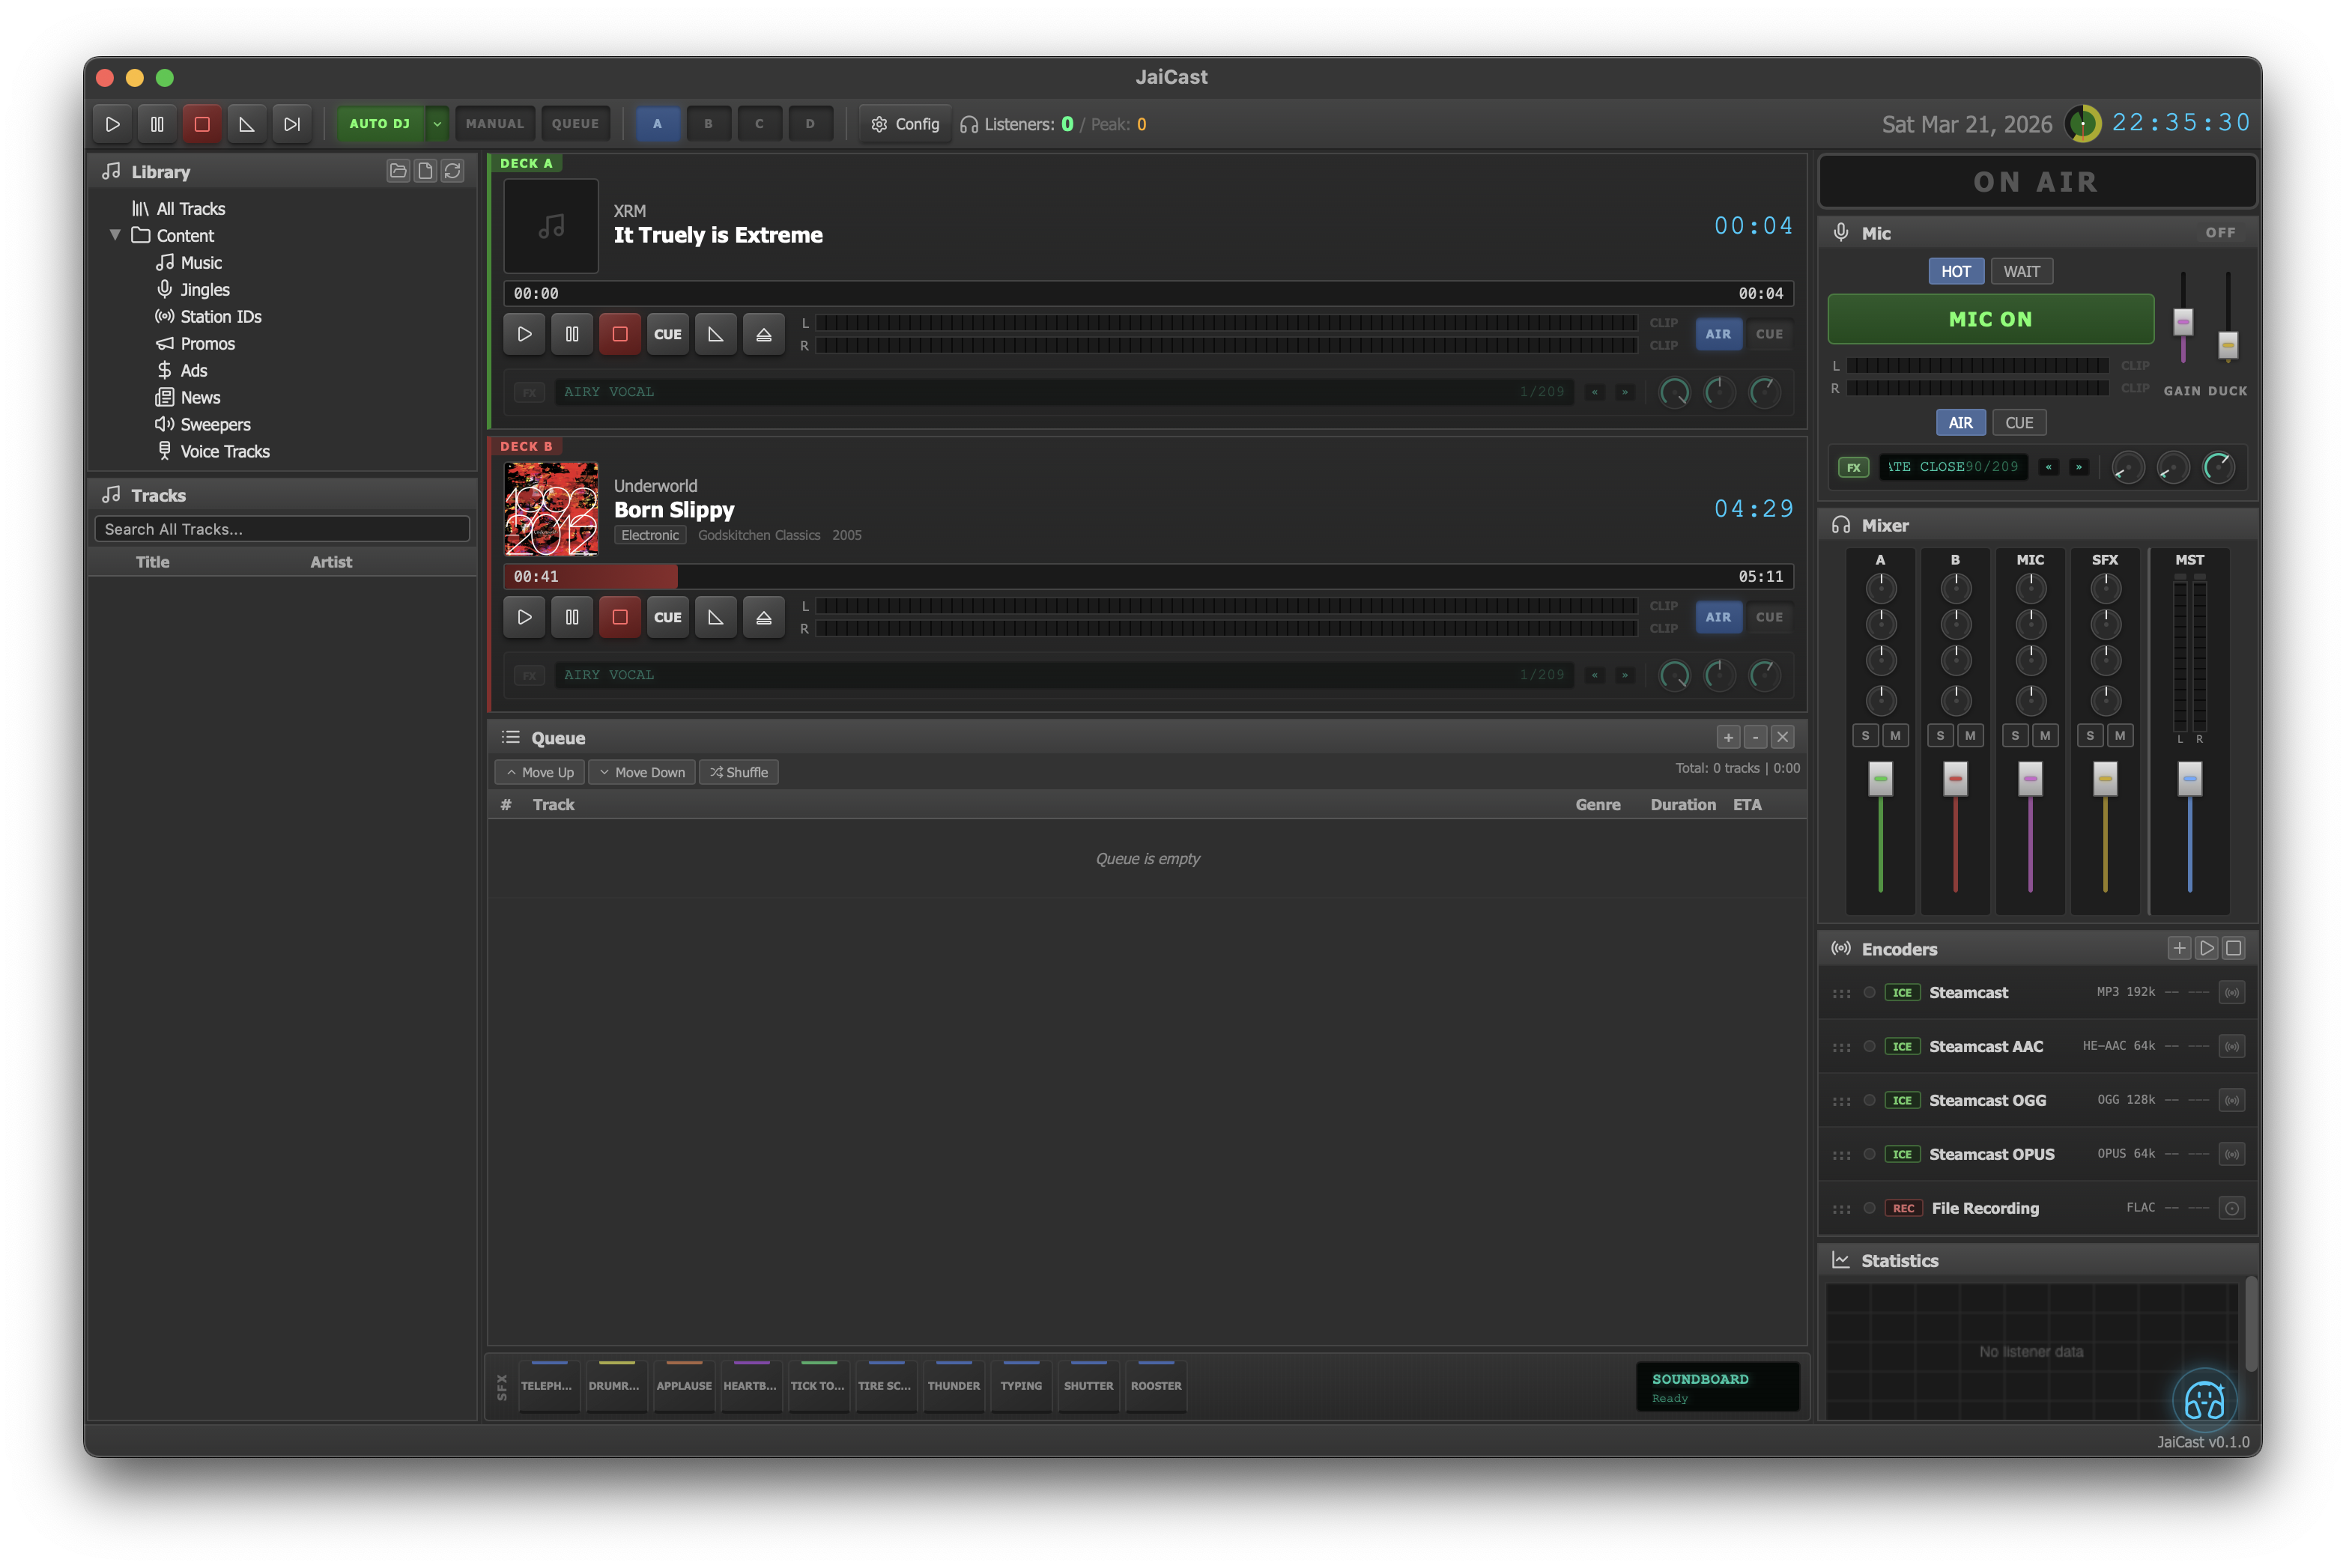
The JaiCast main window layout with all major panels visible.
- Decks A and B at the top — these are your two playback channels with transport controls, waveform displays, and track info.
- Mixer on the right side — volume faders and real-time level meters.
- Library panel on the left — your music collection, organized by categories.
- Queue in the center, below the decks — upcoming tracks, ready to play in order.
- Toolbar along the top — transport controls, DJ mode selector, and settings access.
Everything starts silent with no music loaded. That is normal. Let's fix that.
3. Import Your Music
JaiCast needs to know where your audio files live. To scan a folder into your library:
- In the Library panel (left side), click the Scan Folder button in the Library panel header (folder icon).
- Select a directory containing your music files.
- Choose a category to assign the tracks to (e.g. Music, Jingles, Station IDs).
- JaiCast will scan the folder recursively, reading metadata (title, artist, duration, BPM) from every supported audio file.
Supported formats include MP3, AAC, FLAC, WAV, OGG, and OPUS. The scanner runs in the background, so you can start using the app immediately while it works through large libraries.
4. Play Your First Track
Once your library has some tracks, playing music is straightforward:
- Double-click any track in the Library to load it onto the active deck and begin playback.
- Alternatively, drag a track from the Library and drop it onto Deck A or Deck B.
- Use the Play button in the toolbar to start playback on the active deck.
You should hear audio through your configured output device. Adjust the deck volume fader or the master volume in the mixer to set your levels. The meters should show activity — aim for peaks around -6 dB to leave headroom.
5. Set Up AutoDJ
AutoDJ keeps music playing continuously without manual intervention. It automatically loads the next track, crossfades between decks, and respects your rotation rules.
Enable AutoDJ
- In the toolbar at the top of the screen, find the DJ Mode selector.
- Click Auto to activate AutoDJ.
- If tracks are already in the Queue, AutoDJ will begin playing through them. If the queue is empty, it will pull from your rotation schedule.
Configure Rotation
The rotation system controls what AutoDJ plays and in what order. To set up a basic rotation:
- Switch to Desktop B (Rotation Manager) using the desktop switcher buttons (A/B/C/D) in the top toolbar.
- You will see a Clock Wheel — a list of slots that define your programming cycle.
- Add slots and assign each one a source: a library category, a specific folder, or a file.
- Configure Rule Sets to control artist and title separation (for example, "don't repeat the same artist within 4 tracks").
- Use Preview to see what AutoDJ would generate before going live.
6. Go Live
To broadcast your audio to listeners, you need to connect an encoder to a streaming server. JaiCast supports Icecast, Shoutcast, and several other protocols.
- Click the + button in the Encoders panel on the right side of the main window.
- Select your server type (Icecast or Shoutcast) and enter your connection details:
- Host — the address of your streaming server.
- Port — typically 8000 for Icecast or 8080 for Shoutcast.
- Mount point — the stream path (Icecast only, e.g.,
/live). - Password — your source password from the server configuration.
- Choose your codec (MP3, AAC, OGG/Vorbis, Opus, or FLAC) and bitrate (128 kbps is a good starting point).
- Click Connect. The encoder status indicator will turn green when the connection is established.
Your stream is now live. Listeners can tune in at the URL provided by your streaming server.
7. Next Steps
You now have a working station. Here are some areas to explore as you get comfortable:
Library Management
Organize tracks into categories, edit metadata, and set cue points for tight transitions.
Microphone & Voice
Set up a live microphone for talk breaks, or use AI-generated voice tracks for automated announcements.
Audio Processing
Apply broadcast DSP including compression, EQ, and limiting to polish your on-air sound.
SFX Soundboard
Load sound effects, jingles, and stingers onto pads for instant playback during your show.
Rotation & Scheduling
Build detailed clock wheels with rule sets, artist separation, and daypart programming.
Compliance
Enable jurisdiction-specific broadcast rules (DMCA, CRTC, ARCOM, and more) to stay within regulations.
For a full tour of every panel and control, head to the Interface Overview. For detailed configuration options, browse the Settings section in the sidebar.