Microphone & Voice
Live mic control, AI voice tracks, ducking, and automatic silence handling.
Mic Panel
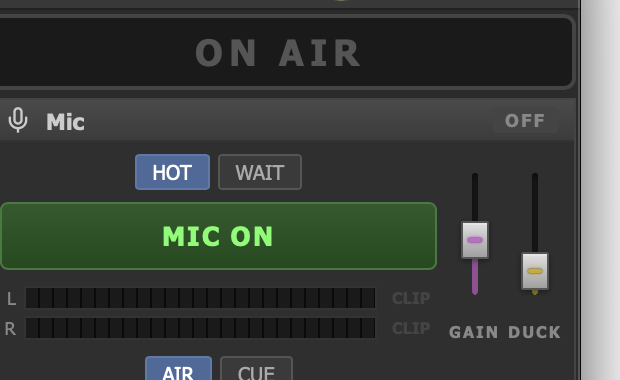
The Mic panel with MIC ON button and AIR/CUE routing.
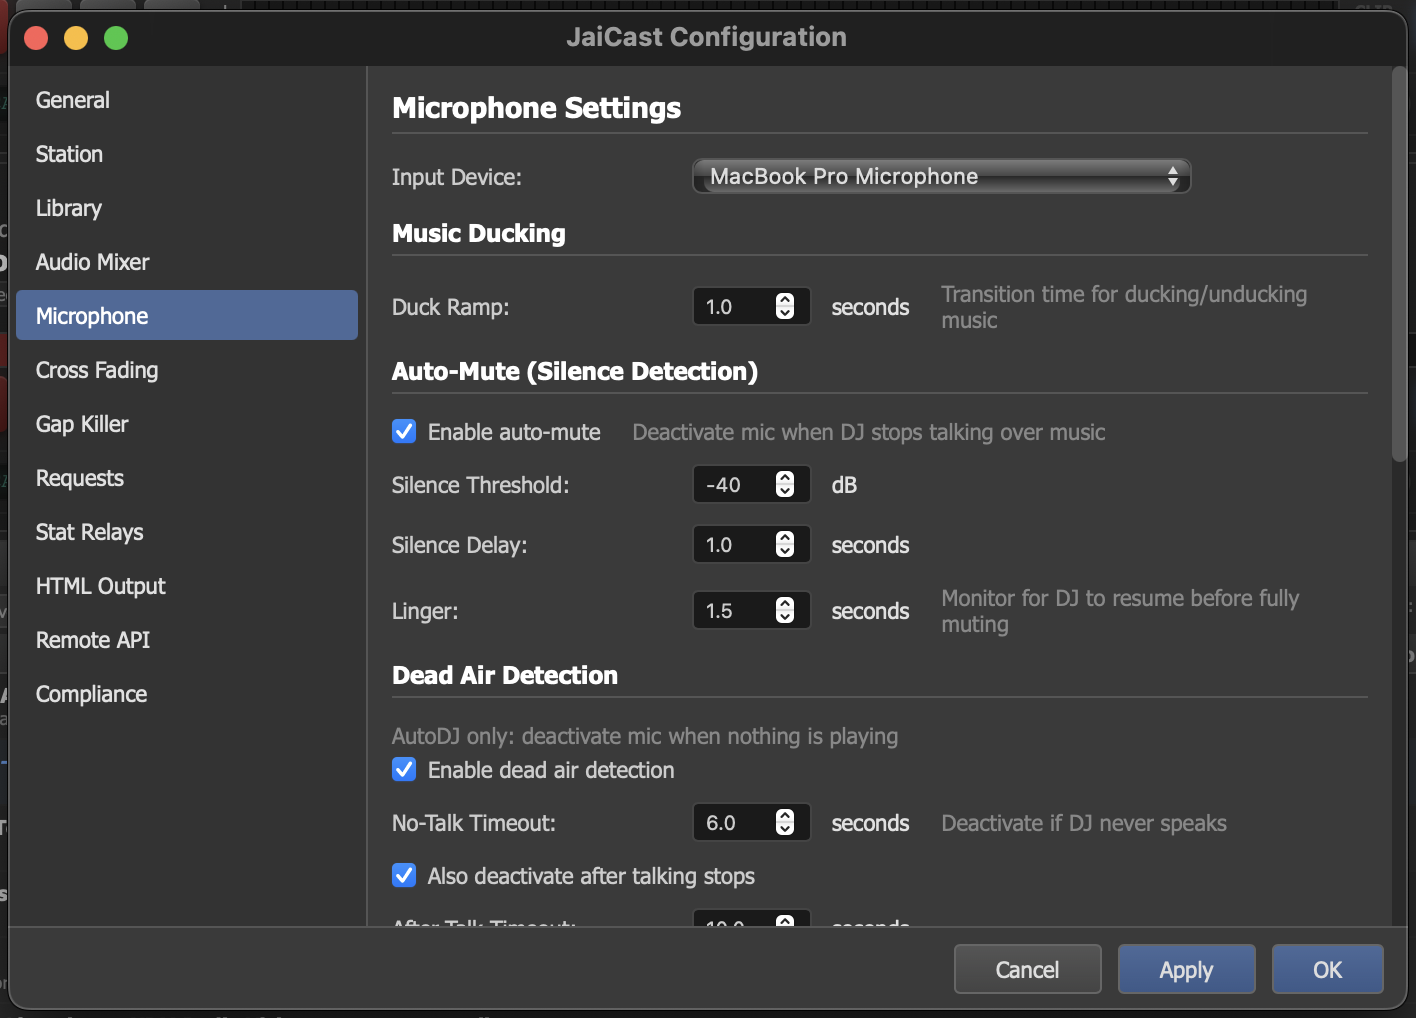
Microphone configuration page with device selection, auto-mute, and dead air settings.
The mic panel sits on the right side of the main window, above the mixer. It provides quick access to microphone activation and routing without leaving the main workspace.
- MIC ON button — click to activate or deactivate the microphone. The button illuminates when the mic is live.
-
Mode selector (HOT / WAIT) — controls when the mic activates:
- HOT — immediate activation. The mic goes live the instant you click MIC ON.
- WAIT — wait for segue. The mic is armed but does not go live until the next crossfade point between tracks.
-
Routing toggles (AIR / CUE) — controls where mic audio is sent.
These are independent toggles:
- AIR — routes mic audio to the broadcast mix, heard by listeners. When AIR is active, music ducking engages automatically.
- CUE — routes mic audio to the headphone preview bus only. Use this to test levels, warm up, or talk to someone in the studio without going on air.
- ON AIR indicator — lights up when the mic is active with AIR routing, giving a clear visual confirmation that you are broadcasting live.
Mic Modes
JaiCast offers two activation modes that control when the mic goes live after you click MIC ON.
| Mode | Behavior |
|---|---|
| Immediate | The mic activates the instant you click MIC ON. Best for spontaneous talk breaks or situations where you need to speak right away. |
| Wait for Segue | The mic is armed but does not go live until the next crossfade point between tracks. This is useful for talk-over transitions: arm the mic, and JaiCast will activate it precisely when the current song ends and the next one begins, giving you a clean entry. |
Music Ducking
When the mic is active with AIR routing, JaiCast automatically lowers the music volume so your voice sits clearly above the mix. This is known as ducking.
How Ducking Works
- Automatic engagement — ducking activates as soon as the mic goes live on AIR. No manual fader adjustment is needed.
- Duck level — the amount by which music volume is reduced. A typical setting is -12 dB to -18 dB, keeping a soft music bed behind the voice.
- Duck ramp — the transition time (in seconds) for the volume to ramp down when ducking begins and ramp back up when the mic is deactivated. A short ramp (0.3–0.5s) sounds punchy and immediate. A longer ramp (1–2s) creates a smoother, more gradual fade.
AutoDJ Guard
While the mic is live on AIR, AutoDJ crossfades are blocked. JaiCast will not transition to the next track until the mic is deactivated. This prevents the system from cross-fading underneath your voice, which would result in an abrupt or overlapping transition.
Auto-Mute (Silence Detection)
Auto-mute monitors the mic input level and automatically mutes the microphone when it detects that the DJ has stopped talking over music. This prevents an open mic from broadcasting room noise, breathing, or paper shuffling while a song is playing.
Configuration
| Parameter | Description |
|---|---|
| Silence Threshold | The dB level below which the mic input is considered silent. A typical value is -40 dB to -50 dB. Set this above your room's ambient noise floor so that background noise alone does not keep the mic open. |
| Silence Delay | How long (in milliseconds) the mic must remain below the threshold before auto-mute engages. The default is 2 seconds. A shorter delay mutes faster but may clip the tail of natural pauses in speech. |
| Linger | A monitoring window after the silence delay fires. During this period, JaiCast watches for the DJ to resume speaking. If sound is detected, the mute is cancelled. If not, the mic is fully muted. This provides a grace period for brief pauses mid-sentence. |
Dead Air Detection
Dead air detection is a safety net that activates only when AutoDJ is enabled. It monitors for situations where the mic is active but no audio is being broadcast — neither music nor voice — and automatically deactivates the mic to let AutoDJ resume normal playback.
Two Scenarios
- No-Talk Timeout — the DJ activated the mic but never spoke. Perhaps they stepped away or forgot the mic was on. JaiCast deactivates the mic after a configurable number of seconds (default: 6 seconds). This is a short timeout because there is no indication the DJ intends to use the mic at all.
- After-Talk Timeout — the DJ spoke and then stopped. JaiCast waits longer before deactivating (default: 10 seconds) to allow for natural pauses, looking at notes, or taking a breath. This timeout can also be disabled entirely if you prefer full manual control after a talk break.
In both cases, once the mic is deactivated, AutoDJ regains control and resumes crossfading to the next track in the queue.
Voice Overlap
When a voice break is playing, JaiCast can start the next music track early if it has a quiet intro, enabling smoother transitions between voice segments and music. Instead of waiting for the voice track to finish completely, the next song begins underneath the tail of the voice break, creating a more natural and professional-sounding segue.
This feature is controlled by two settings: voice_overlap_enabled (on/off)
and voice_overlap_threshold_db (the level below which the voice track's tail
is considered quiet enough to overlap). Both are configurable in Settings.
Voice Tracks
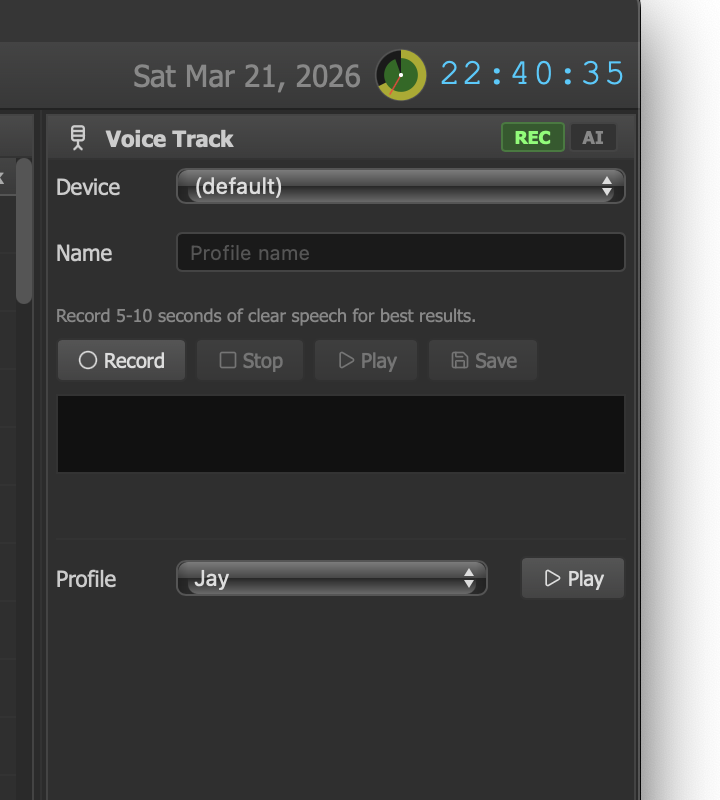
Voice Track panel with AI-generated voice breaks.
Voice tracks are pre-recorded or AI-generated audio segments that can be scheduled between songs, giving an automated broadcast the feel of a live DJ. JaiCast supports both traditional recorded voice tracks and AI-powered text-to-speech generation.
Pre-Recorded Voice Tracks
Record a voice break directly within JaiCast or import a WAV/MP3 file. Pre-recorded voice tracks are stored in the library under the Voice Tracks category and can be scheduled in rotation slots like any other content type.
AI-Generated Voice Tracks (TTS)
JaiCast includes built-in text-to-speech engines that can generate voice tracks from written scripts. This is useful for automated stations that need DJ-style breaks without a live presenter.
-
Multiple TTS backends — JaiCast ships with two built-in TTS engines:
- Chatterbox Turbo — a voice cloning engine using 4 ONNX models based on the ResembleAI architecture. Generates high-quality speech that can mimic a reference voice sample.
- Pocket TTS — a lightweight engine using 5 INT8 ONNX models with SentencePiece tokenization and Kyutai flow-matching synthesis. Fast and efficient for general-purpose voice generation.
- Voice profiles — save different voice configurations (backend, voice, speed, pitch) as named profiles. Switch between profiles for different show segments or station branding.
- Voice cloning — some TTS backends support voice cloning from a reference audio sample, allowing you to generate voice tracks that sound like a specific presenter.
Voice Track Panel Controls
The Voice Track panel provides controls for managing generated voice segments:
- Record — capture a new voice track from the mic input.
- Play — preview a voice track before scheduling it.
- Edit — modify the script text and regenerate, or trim the audio in the track editor.
FX for Mic
The mic channel has its own independent FX chain, separate from the deck audio processing. This allows you to shape and enhance the voice signal without affecting the music.
Available Mic Effects
The mic channel has access to all seven FX algorithms available in JaiCast's FX Engine:
- Plate Reverb — adds space and depth to the voice. A short, subtle reverb can make a dry recording sound more polished. Be conservative with reverb on broadcast voice — too much makes speech harder to understand.
- Mono Delay — single-tap echo effect with feedback and filtering. Useful for creative vocal effects or subtle thickening.
- Stereo Delay — dual-tap delay with independent left/right timing and cross-feedback, creating a wider spatial effect.
- Chorus — LFO-modulated delay for thickening and widening the voice signal.
- Tape Saturation — analog tape emulation that adds warmth and harmonic richness to the voice.
- Parametric Filter — targeted EQ corrections within the FX chain. A common approach is a gentle high-pass filter around 80–100 Hz to remove rumble and plosives, with a mild presence boost around 3–5 kHz for clarity.
- Pitch Shift — real-time pitch shifting with formant preservation, useful for voice character effects.
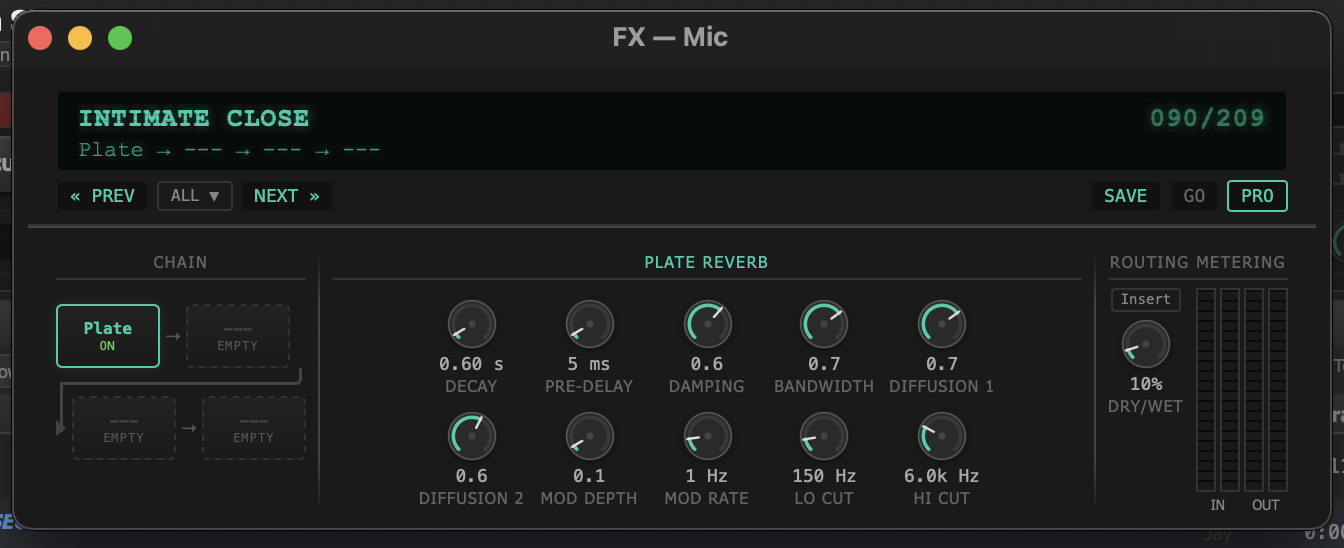
The FX panel showing a Plate Reverb loaded on the Mic channel with dry/wet mix and parameter controls.
Mic FX are accessible from the FX panel. Each effect can be toggled on or off independently, and parameters are saved per-session.