Settings: Audio Mixer
Output devices, sample rate, and meter display configuration.
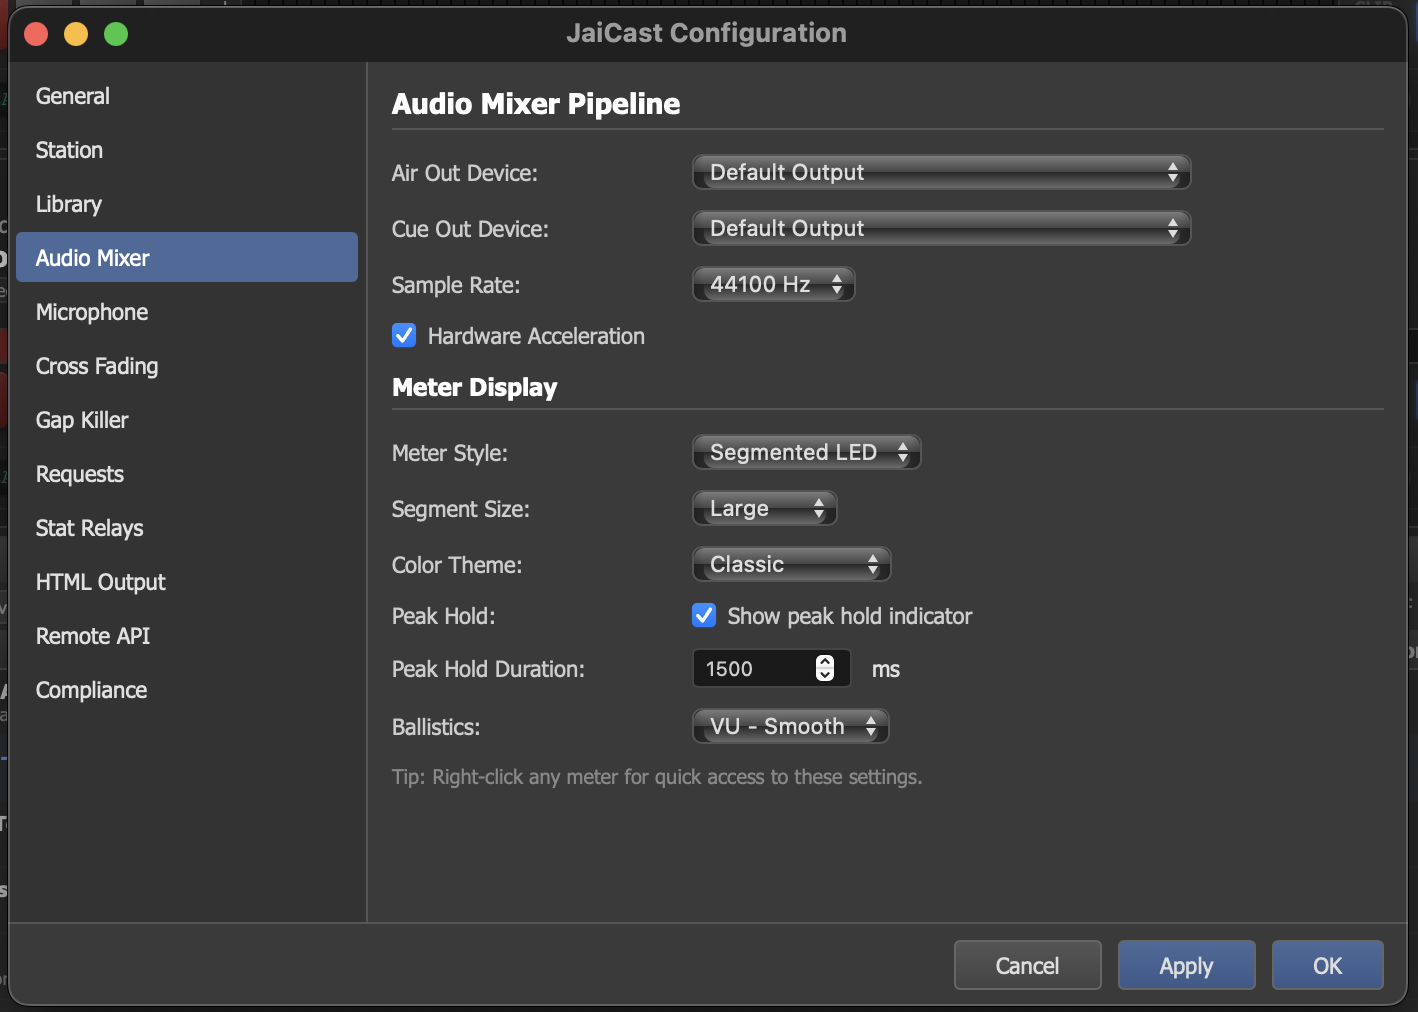
The Audio Mixer settings panel with output device selection and meter configuration.
Output Devices
JaiCast uses two separate audio output paths. Each can be assigned to a different physical audio device, allowing you to monitor on headphones while broadcasting through your main output.
| Output | Purpose |
|---|---|
| Air Out Device | The primary output that carries the broadcast mix. This is the audio that goes to your encoders, streaming servers, and studio monitors. Everything the listener hears comes from this output. |
| Cue Out Device | A secondary output for private monitoring. Use this to preview tracks, listen to cue points, and audition upcoming songs on headphones without the audio going to air. The Cue bus is never sent to encoders. |
Select devices from the dropdown menus, which list all available audio outputs detected by the system. If a device is unplugged or becomes unavailable, JaiCast falls back to the system default output.
Sample Rate
The internal audio engine operates at a fixed sample rate. The default is 44100 Hz (CD quality), which is the standard for internet radio and broadcast.
All audio files are resampled to this rate during decoding. Choosing a higher rate offers no benefit for streaming but increases CPU usage and memory consumption.
Hardware Acceleration
When enabled, JaiCast attempts to use hardware-accelerated audio processing where available. This can reduce CPU usage on systems with supported audio hardware.
If you experience audio glitches or compatibility issues, disable this option to fall back to software-only processing.
Meter Display
The meter display settings control the visual appearance and behavior of the level meters throughout the application (deck meters, mixer meters, and master output meters).
| Setting | Description |
|---|---|
| Style | Choose between Segmented LED (classic broadcast look with discrete segments) and Bar (smooth continuous bar). Both display the same levels, the difference is purely visual. |
| Segment Size | When using the Segmented LED style, this controls the number of segments in each meter bar. More segments give finer resolution. |
| Color Theme | The color gradient used for the meter bars. Standard broadcast colors use green for safe levels, yellow for caution, and red for clipping. |
| Peak Hold | When enabled, a peak indicator line remains at the highest recent level for a short duration before decaying. This makes it easier to spot transient peaks that would otherwise flash by too quickly to read. |
| Ballistics | Controls the meter response characteristics:
|